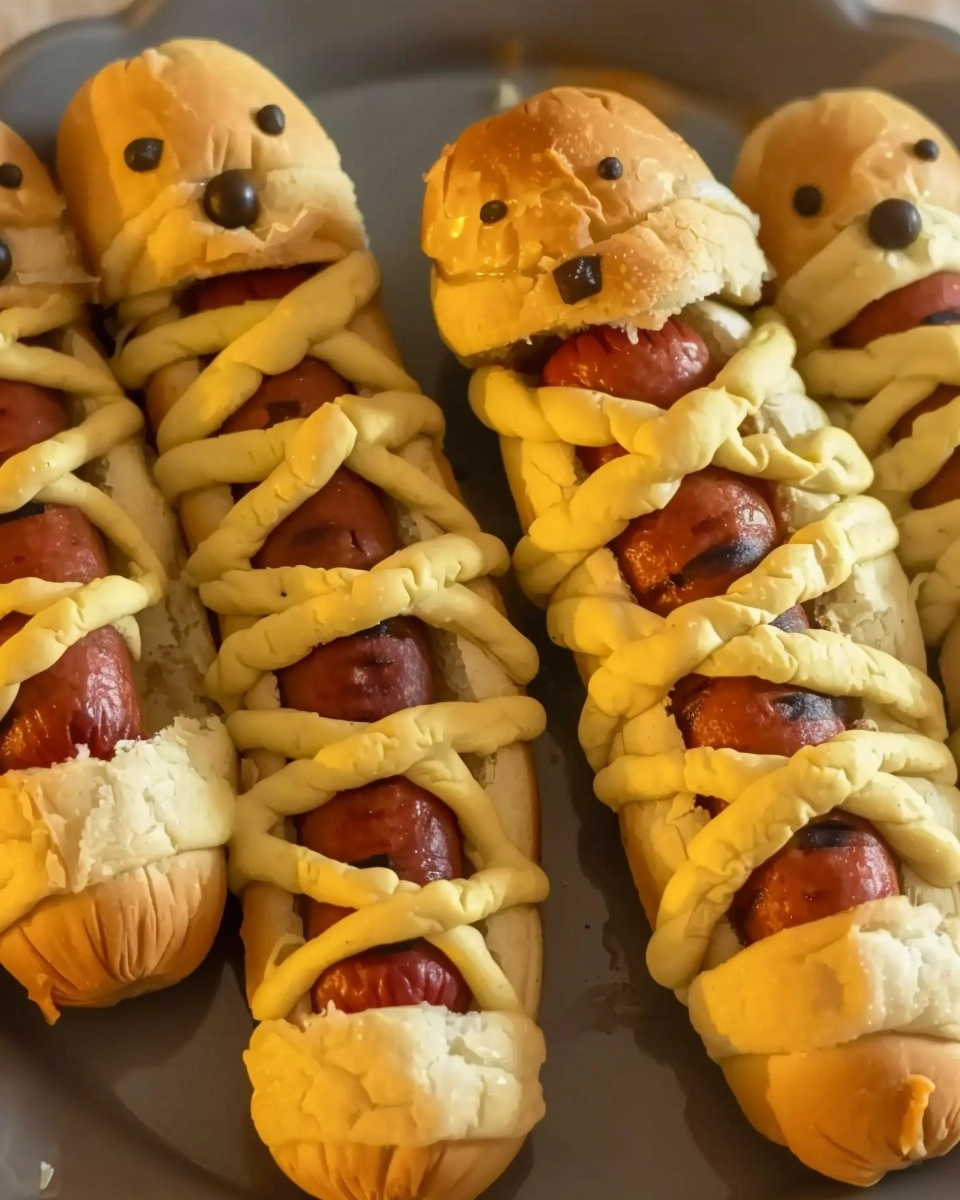
Spooky-cute hot dog mummies wrapped in golden crescent dough—easy, kid-friendly Halloween snacks that are fun to make and even more fun to eat.

Ingredients You’ll Need
The beauty of Hot Dog Mummies is that the ingredient list is both short and perfectly chosen—each component truly makes these snacks stand out. These staples transform simple hot dogs into edible masterpieces, giving you mouthwatering flavor and that can’t-miss mummy look.
- Refrigerated crescent roll dough (8 oz can): Flaky, buttery, and so easy to handle, this dough is the base that wraps your mummies in golden, delicious bandages.
- Hot dogs (8): Juicy, savory, and perfect for all ages, hot dogs are at the heart of this recipe for ultimate comfort food vibes.
- American cheese (2 1/2 slices, quartered, optional): Add a creamy, melty surprise inside your mummies—totally optional, but oh-so-tasty!
- Melted butter (1 tablespoon): Brushing the dough with butter gives a rich flavor and ensures that lovely, deep golden crust.
- Candy eyes or mustard dots (16 small pieces): The finishing touch that brings your Hot Dog Mummies to life—use candy eyes for a whimsical touch or a dab of mustard for easy, edible fun.
How to Make Hot Dog Mummies
Step 1: Prep Your Baking Sheet
Start by preheating your oven to 375°F (190°C) and lining a baking sheet with parchment paper. This simple step saves you from sticky cleanup later and helps your Hot Dog Mummies bake up with an even, golden color.
Step 2: Shape the Mummy Bandages
Unroll the crescent roll dough and gently separate it into four rectangles—don’t worry if it feels a little imperfect, you’ll be pressing those seams together anyway. Press the perforations to seal, then grab a sharp knife or a pizza cutter and slice each rectangle into long, uniform strips about a quarter-inch wide. These strips are your mummy “bandages,” so the more even they are, the better for wrapping.
Step 3: Add the Cheese (If Using)
If you’re going for that gooey, cheesy center (which I highly recommend for extra magic), place a small piece of American cheese on each hot dog. The cheese melts into the dog as it bakes, adding a delightful surprise with every bite.
Step 4: Wrap the Hot Dogs
Take 2–3 dough strips for each hot dog and spiral them around to look like messy mummy bandages. Don’t worry about perfection—wobbly layers actually add to the mummy effect and give each Hot Dog Mummy its own quirky personality. Be sure to leave a little gap at the top for those unmistakable mummy eyes.
Step 5: Brush with Butter & Bake
Lay your wrapped hot dogs onto the prepared baking sheet, then brush each one lightly with melted butter. This not only boosts flavor but helps those bandages turn that irresistible golden brown. Pop them in the oven and bake for 12 to 15 minutes until perfectly puffed and golden.
Step 6: Add Mummy Eyes & Serve
Once your Hot Dog Mummies are out of the oven and have cooled just a bit, finish with two tiny candy eyes or dots of mustard in the gap you left. Suddenly, your snacks have a face—and an attitude! Serve warm, ideally with ketchup and mustard for dunking.
How to Serve Hot Dog Mummies

Garnishes
Have fun dressing up your Hot Dog Mummies! Beyond their trademark eyes, you can sprinkle a bit of chopped fresh parsley for a playful “fresh from the crypt” look, or give them tiny ketchup capes. A small bowl of spicy mustard or a swirl of sriracha can double as a dip and Halloween “blood” for an extra festive flourish.
Side Dishes
Hot Dog Mummies are party-perfect on their own, but they get even better with crowd-pleasing sides. Think crispy baked fries, sweet potato wedges, buttery popcorn, or a crunchy coleslaw for grown-up gatherings. If you’re going full Halloween mode, serve them with a side salad dressed in black (think balsamic vinaigrette) or arrange veggie sticks to look like “witches’ brooms.”
Creative Ways to Present
Bring out your inner artist when serving! Stand your Hot Dog Mummies up in a circle, “guarding” a bowl of dipping sauce, or pile them on a wooden board with fun Halloween props. Placing them in cupcake liners makes for grab-and-go party snacks. For a spooky feast, serve them on a black platter with lots of spiderweb decorations, or stick them upright in a hollowed-out pumpkin for serious wow factor!
Make Ahead and Storage
Storing Leftovers
If you have any Hot Dog Mummies left (which is honestly rare), let them cool completely, then store in an airtight container in the refrigerator for up to three days. They’ll keep their fun shape, and a quick warm-up in the oven brings back a bit of that freshly-baked flavor.
Freezing
You can absolutely freeze Hot Dog Mummies for later fun! Place cooled mummies on a tray to freeze individually, then transfer into a freezer bag for storage—this prevents them from sticking together. When you’re ready for a last-minute spooky snack, just thaw them in the fridge and reheat as needed.
Reheating
For the best texture, reheat Hot Dog Mummies in a 350°F oven for about 8 to 10 minutes until hot and the dough crisps back up. While the microwave is quick, it can make the dough a little chewy, so the oven is the way to go if you have the time.
FAQs
Can I use different types of dough?
Absolutely! Crescent roll dough is classic, but you can swap in puff pastry for extra flakiness or even pizza dough for a more substantial chew. Just keep the strips thin enough so your mummies bake evenly.
What if I don’t have candy eyes?
No candy eyes? No problem! Dots of mustard or ketchup make perfect stand-in peepers, or try sliced olives or black sesame seeds for a more savory look.
Are Hot Dog Mummies good for making with kids?
They’re the perfect hands-on kid project! From wrapping the bandages to adding silly eyes, making Hot Dog Mummies is a fun, safe way to get little chefs helping in the kitchen—and they’ll love eating their creations afterward.
Can I make them vegetarian?
Yes! Simply swap out the regular hot dogs for your favorite plant-based or vegetarian hot dog alternative. Most store-bought brands work wonderfully, and your vegetarian friends won’t miss out on the fun.
How far in advance can I prepare them for a party?
You can assemble Hot Dog Mummies up to a day ahead and store them, unbaked and covered, in the fridge. Bake just before serving to ensure they’re hot and flaky, and add the eyes right after they come out of the oven.
Final Thoughts
If you’re looking to add extra smiles (and maybe a few playful shrieks) to your next party or family night, Hot Dog Mummies are the answer. They’re festive, flavorful, and ridiculously easy to make—even last-minute. Gather your ingredients, let your creativity shine, and get ready for a snack that’s as fun to make as it is to eat!
Print
Hot Dog Mummies Recipe
Description
Adorable and spooky Halloween snacks made with hot dogs wrapped in buttery crescent roll dough to look like mummies — fun, quick, and perfect for parties!
Ingredients
- 1 (8 oz) can refrigerated crescent roll dough
- 8 hot dogs
- 2 1/2 slices American cheese, quartered (optional)
- 1 tablespoon melted butter
- 16 small candy eyes or dots of mustard for eyes
Instructions
- Preheat oven to 375°F (190°C). Line a baking sheet with parchment paper.
- Unroll the crescent dough and separate it into 4 rectangles. Press the perforations to seal.
- Using a knife or pizza cutter, cut each rectangle into long, thin strips (about 1/4 inch wide).
- If using cheese, place a small piece of cheese on each hot dog before wrapping.
- Wrap 2–3 dough strips around each hot dog to look like mummy bandages, leaving a small gap near the top for the eyes.
- Place wrapped hot dogs on the prepared baking sheet. Brush lightly with melted butter.
- Bake for 12–15 minutes, or until the dough is golden brown.
- Remove from oven and let cool slightly. Add candy eyes or small dots of mustard for eyes.
- Serve warm with ketchup or mustard for dipping.
Notes
- Use mustard or ketchup for the eyes if candy eyes aren’t available.
- Great for Halloween parties or themed events.
- Customize with different cheeses or doughs.