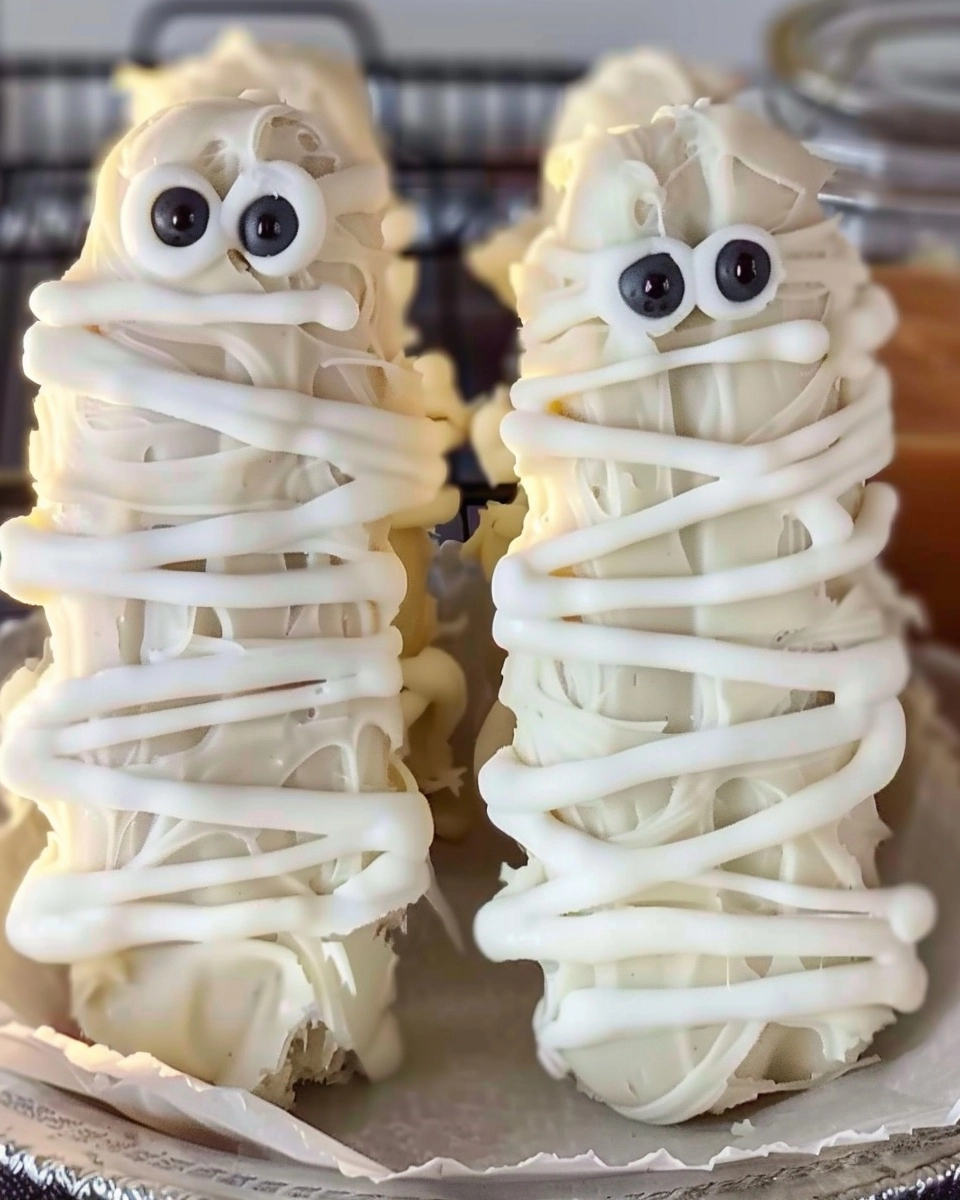
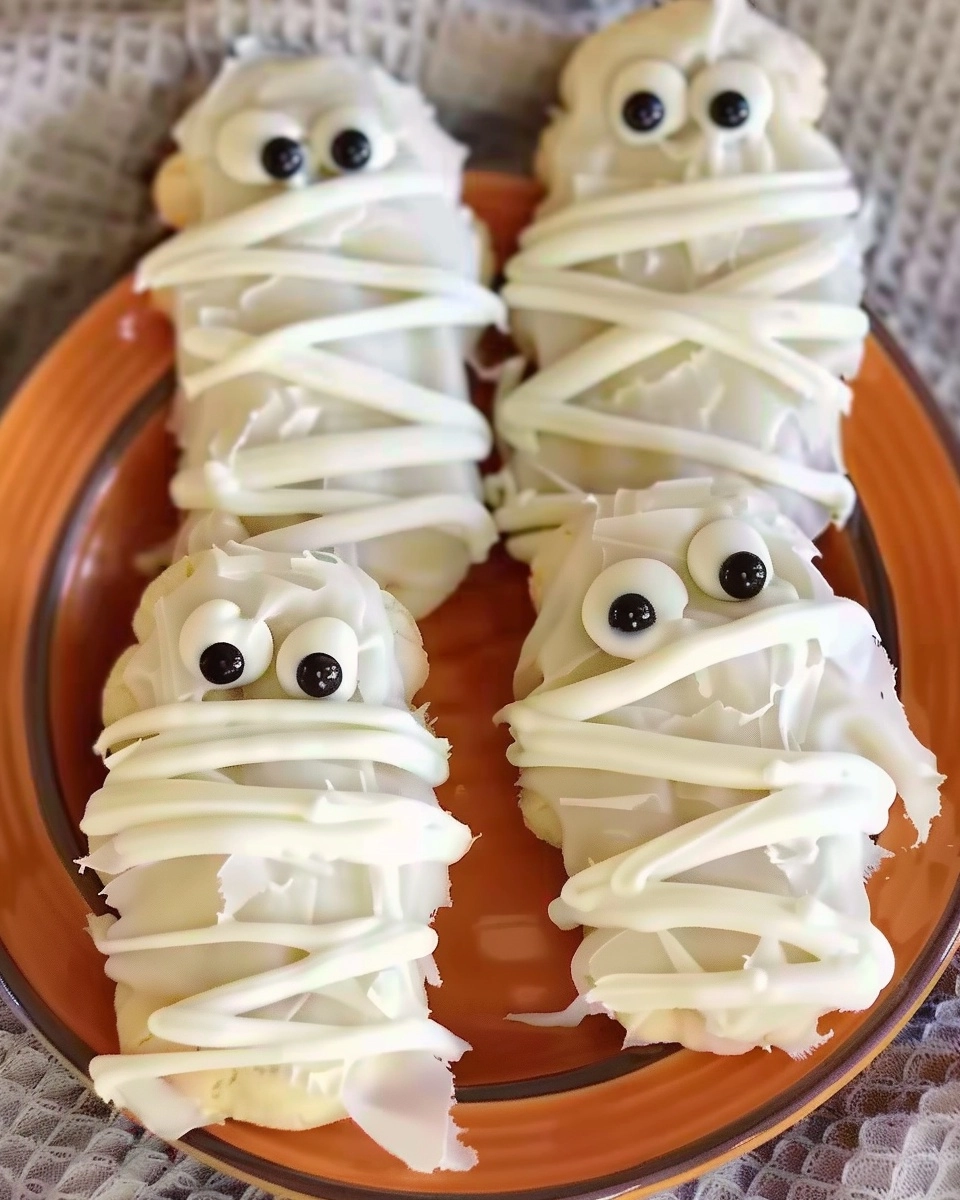
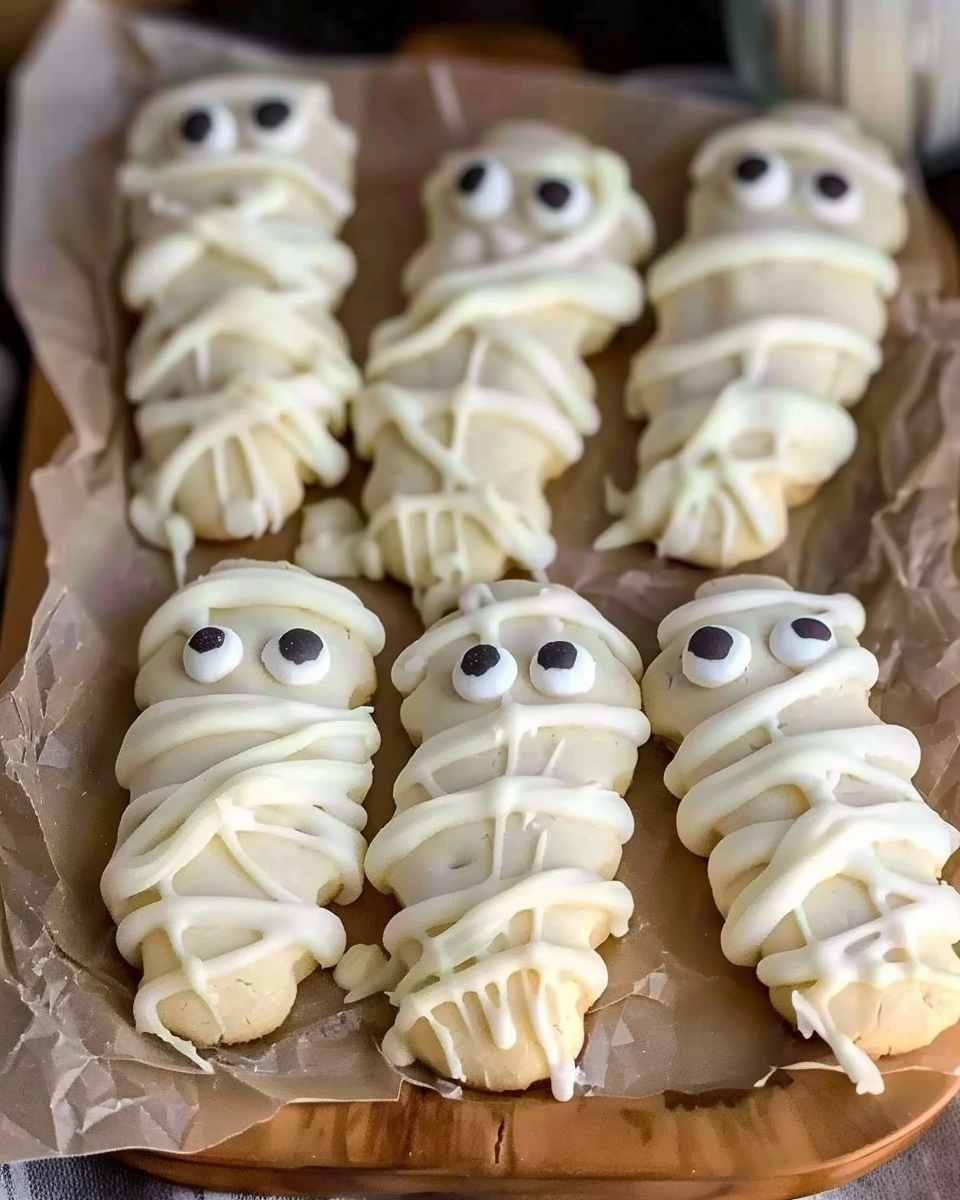
Halloween Mummy Cookies are a ghoulishly delightful treat that never fails to steal the show at any Halloween bash or family gathering. With their soft sugar cookie base covered in playful white chocolate “bandages” and adorable candy eyes peeking out, these cookies are just as much fun to make as they are to eat. Whether you’re planning a class party, handing out spooky snacks, or simply want to add a little monster magic to your dessert table, this recipe transforms everyday ingredients into something wickedly whimsical for October.
Ingredients You’ll Need
The magic of Halloween Mummy Cookies is that they only require a handful of simple ingredients, but each one is absolutely essential in creating the perfect bite. Together, these staples combine to deliver irresistibly soft cookies, creamy chocolate wrapping, and the signature mummy look.
- Refrigerated sugar cookie dough (16.5 oz roll): The ultimate time-saver, this dough guarantees soft, sweet cookies with hardly any effort—perfect for busy party prepping!
- All-purpose flour (1/4 cup, for rolling): A light dusting prevents sticking and makes the dough a breeze to shape into classic mummy ovals or rectangles.
- White chocolate chips or white candy melts (12 oz): These create the mummy’s “bandages,” adding a rich, creamy sweetness that ties everything together.
- Candy eyeballs (about 24 pairs): No mummy is complete without these fun and spooky edible eyes peeking out from the wrappings!
How to Make Halloween Mummy Cookies
Step 1: Prep Your Baking Sheets
Preheat your oven to 350°F (175°C). Line your baking sheets with parchment paper—this little trick keeps the cookies from sticking and makes cleanup a breeze. Plus, it helps ensure that your mummy cookies bake up evenly with a golden touch on the edges.
Step 2: Roll Out the Dough
Lightly flour your work surface and rolling pin with some of that all-purpose flour. Roll out the sugar cookie dough to about 1/4 inch thickness. This is the sweet spot for cookies that bake up soft but are still sturdy enough for all those whimsical decorations!
Step 3: Cut Out Mummy Shapes
Using a knife, bench scraper, or an oval cookie cutter, slice the dough into ovals or rectangles. These basic shapes serve as the perfect “faces” for your mummies—don’t worry about making them identical, the unique shapes just add character. Place the cookies about 2 inches apart on your prepared baking sheets so everyone has room to spread out!
Step 4: Bake and Cool
Pop those trays into the oven for 8–10 minutes. You’re looking for edges that are lightly golden, but still a little soft in the center. After baking, transfer the cookies to a wire rack and let them cool completely before moving on to the next step—trust me, patience pays off here for perfect “bandage” decorating!
Step 5: Melt and Prepare the Chocolate
Pour your white chocolate chips or candy melts into a microwave-safe bowl. Heat in 20-second bursts, stirring between intervals, until the chocolate is totally smooth and creamy. Don’t overheat! If you want extra drizzly bandages, add a tiny bit of coconut oil to thin the chocolate.
Step 6: Create the Mummy Bandages
Spoon the melted chocolate into a piping bag or a zip-top sandwich bag, then snip off a small corner. Pipe zig-zaggy, overlapping lines across each cooled cookie—there’s no need for perfection! The more random, the better for that authentic mummy-wrap look.
Step 7: Add the Eyes and Let Set
While the white chocolate is still soft, gently press two candy eyeballs near the top of each cookie. This gives each mummy its own little personality. Place the cookies aside and let the chocolate harden completely before serving or packaging up your tasty monsters!
How to Serve Halloween Mummy Cookies
Garnishes
To add an extra “wow” to your Halloween Mummy Cookies, scatter a little Halloween-themed colored sugar or edible glitter dust on the platter, or nestle the cookies in a pile of gummy worms for an even spookier vibe. A drizzle of dark chocolate can bring even more “texture” to your edible bandages!
Side Dishes
Pair these cookies with a mug of hot cocoa, a cauldron of punch, or fresh apple cider for a cozy, festive combo. They’re also fantastic alongside caramel apples or a bowl of popcorn for the ultimate Halloween snack spread.
Creative Ways to Present
Serve Halloween Mummy Cookies on a platter surrounded by candy corn and marshmallow ghosts for a themed dessert table, or tuck them into cellophane treat bags with a spooky ribbon for party favors. For super fun, stand them upright “peeking” out of a decorated shoe box coffin!
Make Ahead and Storage
Storing Leftovers
Once the white chocolate has set, store your Halloween Mummy Cookies in an airtight container at room temperature. They’ll stay fresh and tasty for about 3–4 days, making them perfect for making ahead before your spooky gathering.
Freezing
If you want to get a jump on your Halloween baking, these cookies freeze beautifully. Arrange them in a single layer (or separated with wax paper) in a freezer-safe container. Simply thaw at room temperature whenever your sweet tooth—or party—calls!
Reheating
No need to reheat these cookies since they’re meant to be served at room temperature. If you want to restore that bakery-fresh softness, let any chilled or frozen cookies come to room temp naturally; microwaving may melt those perfectly piped bandages.
FAQs
Can I use homemade sugar cookie dough instead of store-bought?
Absolutely! If you have a favorite sugar cookie recipe, feel free to swap it in. Just make sure the dough is easy to roll out and holds its shape for those mummy ovals.
What’s the best way to melt the white chocolate?
Microwaving in short bursts with frequent stirring keeps the chocolate creamy and smooth. You can also melt it gently over a double boiler if you prefer more control. Be careful not to overheat, as white chocolate can seize up quickly.
Where do I find candy eyeballs?
Candy eyeballs are available in the baking aisle of most grocery stores during the fall, or year-round at craft and baking shops. You can also order them easily online—it’s worth stocking up for all your spooky treats!
Can I decorate Halloween Mummy Cookies with kids?
Definitely! Kids love piping on the “bandages” and placing the candy eyes. Just make sure the cookies are completely cool before decorating, and be prepared for some giggles and silly mummy faces.
Do these cookies travel well for parties or school events?
Yes, once the chocolate has set, Halloween Mummy Cookies are sturdy enough to pack in treat boxes or containers. Just be gentle with the candy eyes and avoid stacking them directly on top of each other if possible.
Final Thoughts
I can’t think of a more charming way to celebrate October than gathering friends, kids, or coworkers together for a batch of Halloween Mummy Cookies. Their cute faces and irresistible sweetness are sure to bring smiles all around, so don’t be surprised when everyone asks for the recipe. Happy haunting and happy baking!
Print
Halloween Mummy Cookies Recipe
- Total Time: 25 minutes
- Yield: 24 cookies 1x
- Diet: Vegetarian
Description
These Halloween Mummy Cookies are a delightfully spooky treat, featuring golden sugar cookies wrapped in sweet white chocolate ‘bandages’ and finished with playful candy eyes. Easy to make with refrigerated dough and fun for kids’ parties, they promise festive fun and delicious bites in every spooky shape!
Ingredients
Sugar Cookie Base
- 1 (16.5 oz) roll refrigerated sugar cookie dough
- 1/4 cup all-purpose flour (for rolling)
Decorations
- 12 oz white chocolate chips or white candy melts
- About 24 pairs candy eyeballs
Instructions
- Prepare for Baking: Preheat your oven to 350°F (175°C). Line baking sheets with parchment paper to prevent sticking and for easy cleanup.
- Roll Out Dough: Lightly flour your work surface. Place the sugar cookie dough on it and roll out to about 1/4 inch thick for even cookies.
- Shape the Cookies: Cut the dough into oval or rectangle shapes to mimic mummy faces. Place the shaped cookies 2 inches apart on your prepared baking sheets for ample room while baking.
- Bake the Cookies: Bake in the preheated oven for 8–10 minutes until the edges are just turning lightly golden. Transfer to a wire rack and cool completely before decorating.
- Melt the White Chocolate: In a microwave-safe bowl, melt the white chocolate chips or candy melts in 20-second intervals, stirring after each, until smooth and fully melted.
- Pipe the Mummy Bandages: Spoon some melted chocolate into a piping bag or a plastic sandwich bag with a small corner snipped off. Pipe thin, crisscrossing lines across each cookie to look like mummy bandages.
- Add the Eyes: While the white chocolate is still wet, gently press two candy eyeballs near the top of each cookie for the perfect mummy look.
- Set and Serve: Allow the chocolate to set completely at room temperature before serving or storing your Halloween Mummy Cookies.
Notes
- If the dough becomes too soft while shaping, refrigerate for 10 minutes to firm it up.
- You can use homemade sugar cookie dough if preferred.
- Substitute white chocolate with colored candy melts for a fun twist.
- Store cookies in an airtight container at room temperature for up to 1 week.
- Prep Time: 15 minutes
- Cook Time: 10 minutes
- Category: Desserts
- Method: Baking
- Cuisine: American
Nutrition
- Serving Size: 1 cookie
- Calories: 180 kcal
- Sugar: 15g
- Sodium: 85mg
- Fat: 7g
- Saturated Fat: 4g
- Unsaturated Fat: 2g
- Trans Fat: 0g
- Carbohydrates: 27g
- Fiber: 0g
- Protein: 2g
- Cholesterol: 10mg