Bake a batch of Dad’s favorite peanut butter cookies—classic, buttery, and golden! A comforting family recipe perfect for gatherings or gifting love.
Ingredients You’ll Need
You won’t believe how a few pantry staples come together to make Dad’s Favorite Peanut Butter Cookies shine. Each ingredient plays a key role, adding flavor, texture, or that signature tenderness that makes these cookies memorable.
- Shortening: Gives a light, tender crumb and helps the cookies hold their shape.
- Crunchy peanut butter: Packs a punch of nutty flavor and adds those tiny, satisfying peanut pieces.
- White sugar: Sweetens the cookies and helps them brown beautifully.
- Packed brown sugar: Adds depth, a touch of molasses richness, and keeps the centers chewy.
- Large egg: Binds everything together and adds moisture for perfect texture.
- All-purpose flour: Forms the sturdy structure of the cookie, ensuring they don’t spread too much in the oven.
- Baking soda: Provides lift and softness with every bite.
- Baking powder: Helps the cookies rise and become just the right thickness.
- Salt: Balances the sweetness and brings out the best in the peanut butter flavor.
How to Make Dad’s Favorite Peanut Butter Cookies
Step 1: Cream the Butters and Sugars
Start by adding the shortening, crunchy peanut butter, white sugar, and brown sugar to a large mixing bowl. Use an electric mixer and beat everything together until the mixture is light, fluffy, and you can barely resist sneaking a fingerful. This step blends the fats and sugars so your cookies stay perfectly tender and flavorful.
Step 2: Mix in the Egg
Crack your large egg into the bowl and beat it in just until incorporated. The egg adds both moisture and structure, so take a moment to make sure it’s fully mixed in for evenly textured dough.
Step 3: Combine the Dry Ingredients
In a separate bowl, whisk together your all-purpose flour, baking soda, baking powder, and salt. Whisking first ensures these leaveners and salt get distributed evenly throughout the dough, which helps your cookies bake up with just the right rise and texture.
Step 4: Bring It All Together
Gradually stir the dry mixture into your peanut butter base, mixing just until no flour streaks remain. The dough will be thick, slightly sticky, and full of promise for amazing cookies. If it feels especially sticky, you can add a tablespoon or two of extra flour.
Step 5: Chill the Dough
Cover the bowl with plastic wrap and refrigerate the dough for at least 1 hour. This gives the fats time to firm up, making the dough easier to handle and ensuring the cookies bake evenly—no spreading into pancake territory!
Step 6: Shape and Pattern
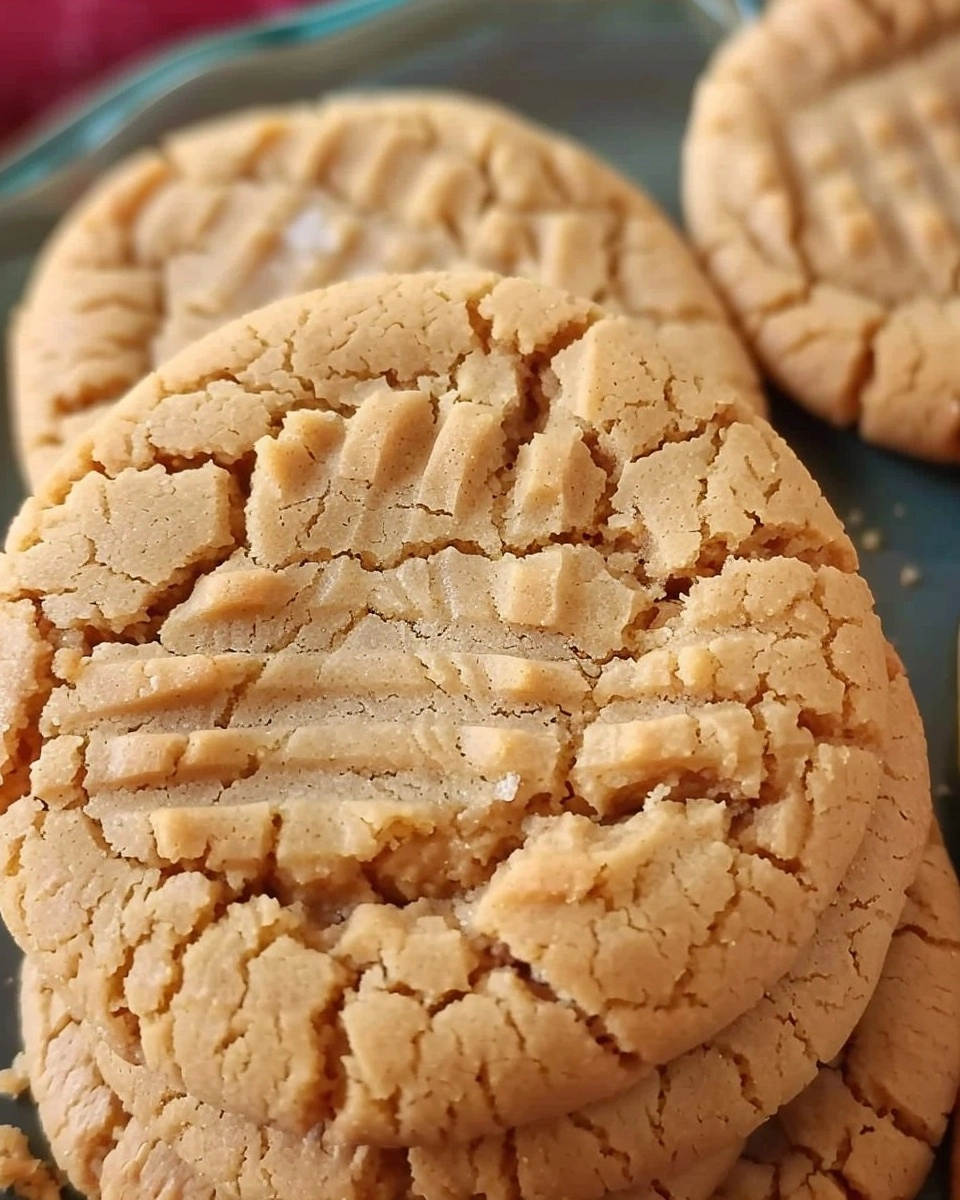
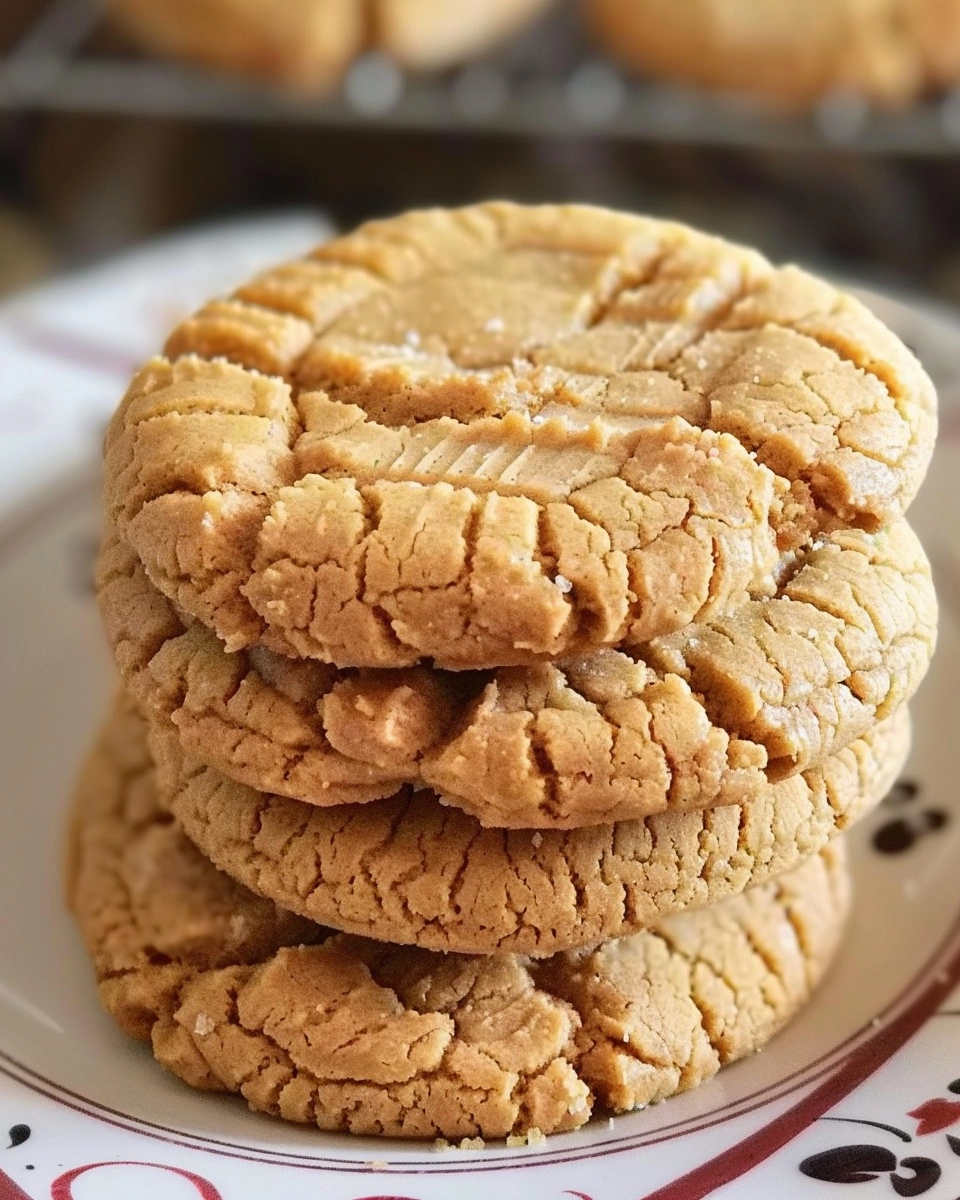
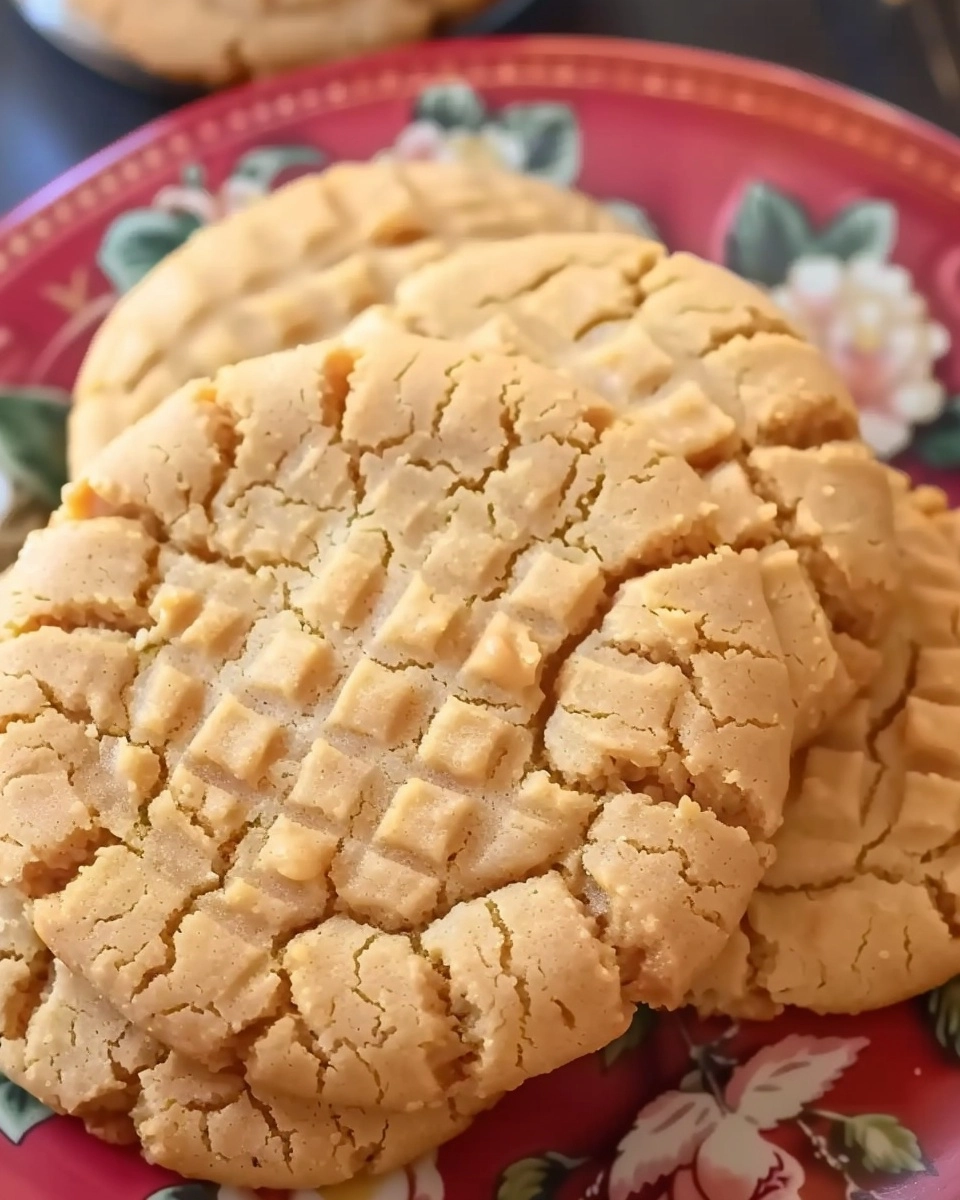
Preheat your oven to 375 °F (190 °C). Scoop out walnut-sized pieces of dough and roll them into balls. Arrange them about 2 inches apart on your baking sheets. Dip a fork in flour and gently press each dough ball twice—once in each direction—to create that classic crosshatch pattern. It’s tradition, and makes Dad’s Favorite Peanut Butter Cookies instantly recognizable.
Step 7: Bake, Cool, and Enjoy
Bake for 10 to 12 minutes, until the edges are set and just turning golden. Let them sit on the baking sheet for a minute before transferring to a wire rack to cool completely. The texture will be soft at first, then settle into that perfectly chewy-yet-crisp cookie everyone loves.
How to Serve Dad’s Favorite Peanut Butter Cookies
Garnishes
For a special touch, sprinkle the cookies with a pinch of coarse sea salt right after baking. A drizzle of melted chocolate or a dusting of powdered sugar can also take these charming classics to another level. Sometimes, we add a few chopped roasted peanuts to accentuate the crunch for a truly custom batch.
Side Dishes
There’s nothing like Dad’s Favorite Peanut Butter Cookies fresh from the oven alongside a tall glass of cold milk. They are also wonderful with a scoop of vanilla ice cream or served as part of a cozy dessert platter with brownies and fresh fruit.
Creative Ways to Present
Arrange these cookies in a rustic tin lined with parchment for a homey gift. If you’re feeling playful, use them to make peanut butter cookie ice cream sandwiches, or plate them alongside dollops of jam for that PB&J nostalgia. Stacking them in a clear jar tied with a ribbon always makes Dad smile.
Make Ahead and Storage
Storing Leftovers
Once cooled, transfer your cookies to an airtight container. They’ll stay chewy and fresh for about a week at room temperature, though in our house, a batch of Dad’s Favorite Peanut Butter Cookies rarely lasts that long!
Freezing
These cookies freeze beautifully. Place them in a single layer on a baking sheet, freeze, then pop them into freezer bags for up to three months. You can also freeze the dough balls—just thaw slightly before baking for fresh cookies whenever Dad gets a craving.
Reheating
If you love warm cookies, a quick zap in the microwave (about 8–10 seconds) brings back that just-baked softness. For a tiny bit of crunch again, a minute in a low oven (300 °F) does wonders.
FAQs
Can I use creamy peanut butter instead of crunchy?
Absolutely! If you prefer a smoother texture, substitute creamy peanut butter without changing the measurements. Just know you’ll miss a bit of the playful crunch that makes Dad’s Favorite Peanut Butter Cookies extra special.
What if I don’t have shortening?
Vegetable shortening gives these cookies their lovely texture, but you can swap with an equal amount of unsalted butter. The cookies will be a little more buttery and may spread slightly more, but they’re still delicious.
Do I have to refrigerate the dough?
Chilling is key for this recipe—it ensures the cookies bake up thick, not flat. If you’re short on time, you can chill it for just 30 minutes, but the longer rest helps the flavors meld and gives the perfect texture.
How do I make these gluten-free?
Simply substitute your favorite 1:1 gluten-free flour blend for the all-purpose flour. Test one or two cookies first to see if the texture needs a bit more flour, as gluten-free blends sometimes behave differently.
Why do my cookies crack when baking?
A few cracks on top are totally normal and even part of the charm of classic peanut butter cookies! Overbaking or using too much flour can make them dry out, so aim to bake until just set for that perfect chew.
Final Thoughts
No matter the season or reason, Dad’s Favorite Peanut Butter Cookies belong on every cookie platter and in every kitchen. Give this tried-and-true recipe a shot—once you taste that first warm, peanut-buttery bite, you’ll understand why these are the cookies everyone asks for by name. Happy baking!
Print
Dad’s Favorite Peanut Butter Cookies Recipe
- Total Time: 1 hour 27 minutes (includes chilling time)
- Yield: 36 cookies 1x
- Diet: Vegetarian
Description
Rich, chewy, and packed with nostalgic flavor, this peanut butter cookies recipe is Dad’s all-time favorite—perfect for family baking and cozy treats.
Ingredients
Wet Ingredients
- ½ cup shortening
- ½ cup crunchy peanut butter
- ½ cup white sugar
- ½ cup packed brown sugar
- 1 large egg
Dry Ingredients
- 1 ¼ cups all-purpose flour (plus more if needed)
- ¾ teaspoon baking soda
- ½ teaspoon baking powder
- ¼ teaspoon salt
Instructions
- Cream the Fats and Sugars: In a large mixing bowl, use an electric mixer to beat together the shortening, crunchy peanut butter, white sugar, and brown sugar until the mixture is light and fluffy. This incorporates air and ensures a tender cookie texture.
- Add the Egg: Crack in the large egg and beat until fully incorporated into the creamed mixture, scraping down the sides of the bowl as needed for even mixing.
- Mix the Dry Ingredients: In a separate bowl, whisk together the all-purpose flour, baking soda, baking powder, and salt. This helps distribute the leavening agents evenly.
- Combine Wet and Dry: Gradually stir the dry ingredients into the peanut butter mixture until just combined. If the dough feels too sticky, add a spoonful or two more flour as needed.
- Chill the Dough: Cover the bowl with plastic wrap and refrigerate for at least 1 hour. Chilling prevents spreading and enhances flavor.
- Preheat the Oven: Set your oven to 375°F (190°C) so it’s hot and ready for baking.
- Shape the Cookies: Roll chilled dough into walnut-sized balls and space them about 2 inches apart on ungreased baking sheets. Using a fork dipped in flour, flatten each ball with a crisscross pattern on top.
- Bake: Bake for 10 to 12 minutes, or until the edges are set and the tops are lightly golden. The centers may look slightly soft—that’s perfect for chewy cookies.
- Cool: Remove the cookies from the oven and transfer them to wire racks to cool completely before serving or storing.
Notes
- Chilling the dough is crucial—it prevents excessive spread and intensifies flavor.
- Slightly underbaking yields a chewier center; bake longer for crispier cookies.
- Feel free to use creamy peanut butter if you prefer a smoother texture.
- Swap shortening for unsalted butter for a richer flavor, but texture may be altered.
- Cookies freeze well for up to 2 months in an airtight container.
- Prep Time: 15 minutes
- Cook Time: 12 minutes
- Category: Desserts
- Method: Baking
- Cuisine: American
Nutrition
- Serving Size: 1 cookie
- Calories: 87
- Sugar: 5g
- Sodium: 73mg
- Fat: 4.7g
- Saturated Fat: 1.2g
- Unsaturated Fat: 3.1g
- Trans Fat: 0g
- Carbohydrates: 10g
- Fiber: 0.4g
- Protein: 1.5g
- Cholesterol: 6mg