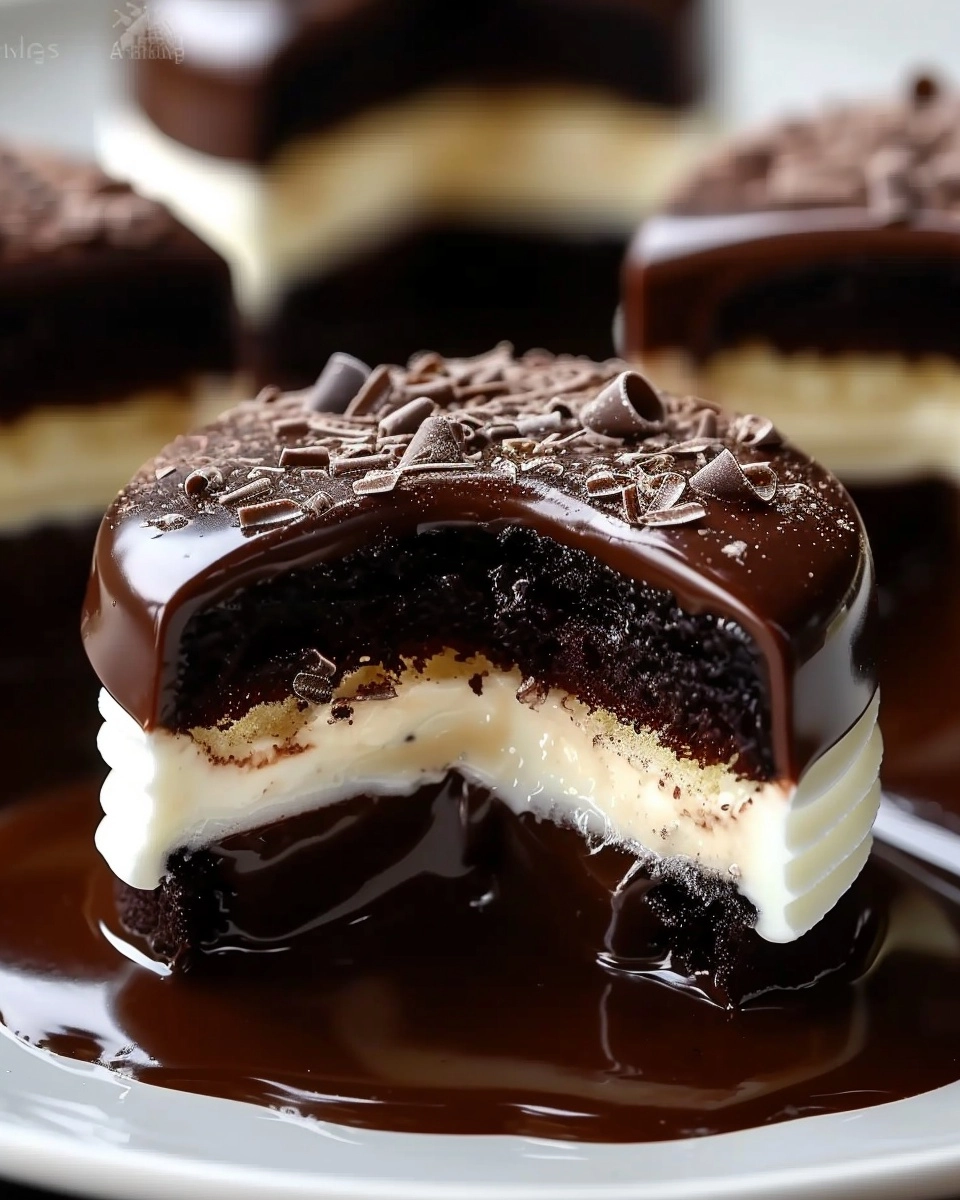
If you’re longing for a bakery-worthy yet delightfully nostalgic treat, these Cream-Filled Chocolate Dream Cakes fit the bill perfectly. Imagine mini chocolate cakes that are rich and tender, brimming with a cloud of vanilla cream, and then wrapped in a glossy chocolate shell you can crack through with a fork. This recipe revives the magic of your favorite childhood snack cakes, but with a homemade twist that’s so much more luscious and fresh. Whether for birthdays, lunchboxes, or just a pick-me-up with coffee, Cream-Filled Chocolate Dream Cakes always deliver that joyful “wow” moment.
Ingredients You’ll Need
The beauty of these Cream-Filled Chocolate Dream Cakes is that the ingredients are simple pantry staples, each playing a crucial role in the final bite. Don’t underestimate how a good cocoa powder or creamy butter can make these cakes truly unforgettable!
- All-purpose flour: The foundation that gives the mini cakes their tender crumb and keeps them structured but soft.
- Unsweetened cocoa powder: Choose a high-quality cocoa for a deep, rich chocolate flavor.
- Baking soda: Lends lightness by helping the cakes rise to perfectly fluffy heights.
- Salt: Just a pinch, but it accentuates the chocolate and balances the sweetness beautifully.
- Granulated sugar: Sweetens the cakes and helps create that classic soft bite.
- Brown sugar: Adds a touch of molasses warmth and makes the crumb extra moist.
- Unsalted butter: Used in both the cake and filling for ultimate richness and smoothness—make sure it’s fully softened!
- Eggs: Bind everything together and add tenderness to each mini cake.
- Vanilla extract: Infuses both cake and filling with aromatic, creamy undertones.
- Whole milk: Keeps the cake batter moist and adds a lovely soft texture.
- Powdered sugar: Creates a fluffy, stable filling when whipped with butter.
- Heavy cream: Makes the cream filling extra light and dreamy—you can sub in milk, but the richness is key!
- Semi-sweet chocolate chips: The secret to a glossy, snappy outer shell with just the right balance of sweet and dark.
- Coconut oil or butter: Stirred into the chocolate coating, this ensures a smooth, pourable glaze that sets beautifully.
How to Make Cream-Filled Chocolate Dream Cakes
Step 1: Prep Your Pans and Ingredients
Start by setting the stage for baking magic—preheat your oven to 350°F (175°C) and either grease or line a mini cake pan or cupcake tin. Having everything ready and at room temperature makes blending the batter a breeze and ensures all your cakes bake evenly.
Step 2: Make the Chocolate Cake Batter
In a medium bowl, whisk together the flour, cocoa powder, baking soda, and salt. In a larger bowl, beat the sugars and softened butter until light and fluffy—you want to see it almost pale and fluffy. Add in the eggs one at a time for a silky-smooth batter, followed by the vanilla. Alternate adding your dry ingredients and milk to the butter mixture, starting and ending with the dry mix. Mix until just combined for the most tender cakes.
Step 3: Fill and Bake
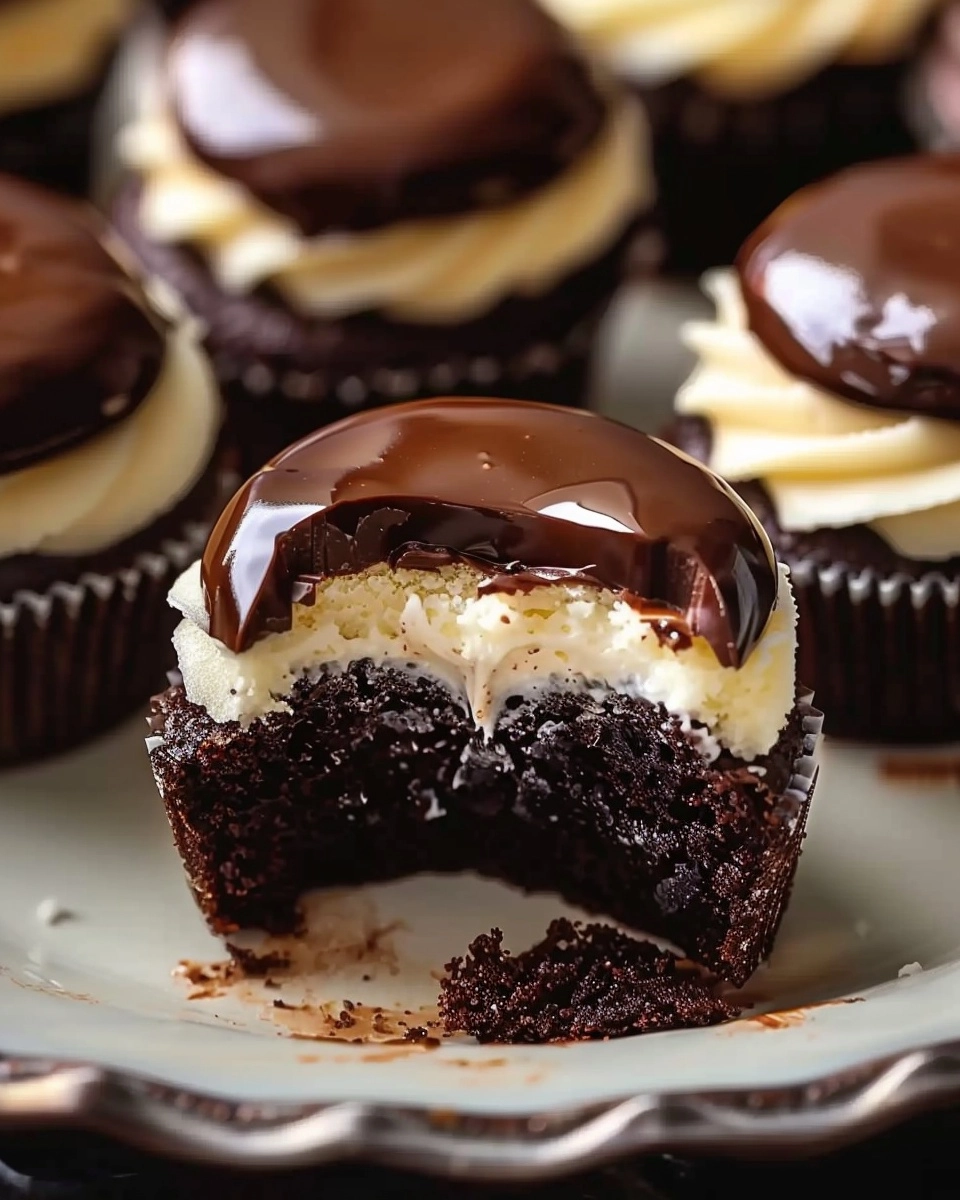
Divide the batter among your prepared pans, filling each about two-thirds full. Don’t overfill or you’ll lose those perfect cupcake-like shapes. Bake for 12 to 15 minutes—keep an eye on them! When a toothpick comes out clean (or with a few crumbs), they’re ready. Let the cakes cool completely before you even think about filling them.
Step 4: Whip Up the Vanilla Cream Filling
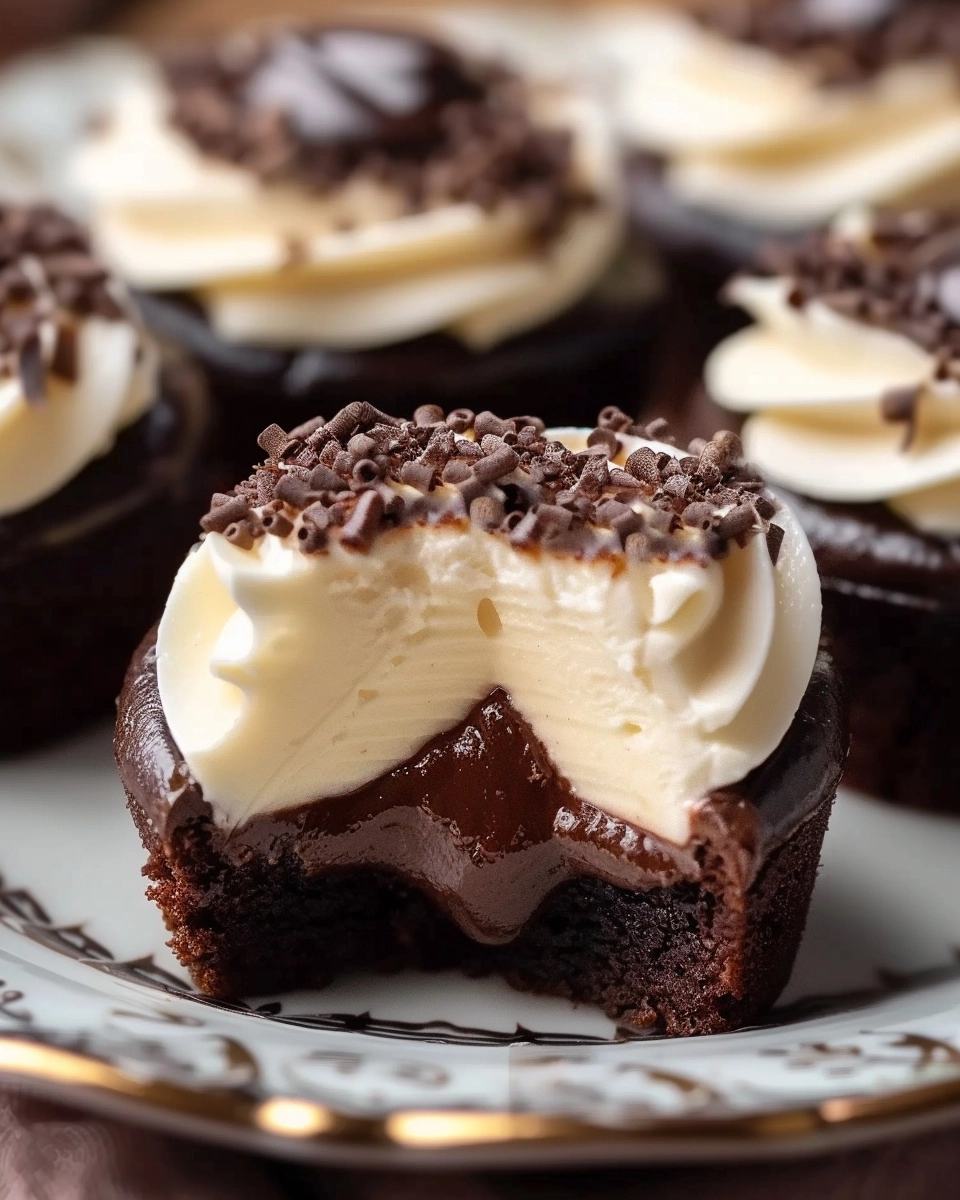
While your cakes are cooling, beat the butter for the filling until creamy and almost cloud-like. Slowly add in powdered sugar so it incorporates smoothly, then drizzle in the vanilla and heavy cream. Beat until pillowy—this is where Cream-Filled Chocolate Dream Cakes get their signature “fluff” factor. The texture should be thick enough to hold its shape when piped.
Step 5: Fill the Cakes
Once your cakes are fully cool, carefully slice each in half horizontally. Either pipe or generously spread the cream onto the bottom half—don’t shy away from a proper layer. Sandwich with the top half to create that classic creme-filled effect everyone loves.
Step 6: Coat with Chocolate
For the finishing touch, melt your chocolate chips with the coconut oil (or butter) in the microwave or over a double boiler, stirring until luxuriously smooth. Dip each cake or spoon the chocolate over the tops, making sure each one gets left with a thick, shiny coating. Place on a parchment-lined tray so the chocolate can set up perfectly.
Step 7: Let Set and Enjoy!
Wait patiently as the chocolate coating firms up; this is crucial for that satisfyingly crisp shell. Once set, your Cream-Filled Chocolate Dream Cakes are ready to enjoy, gift, or sneak into lunchboxes for a happy surprise.
How to Serve Cream-Filled Chocolate Dream Cakes
Garnishes
Though these treats are showstoppers on their own, a little extra flourish can take things to the next level. A dusting of powdered sugar, a sprinkle of chocolate shavings, or even some fun rainbow sprinkles make each Cream-Filled Chocolate Dream Cake feel like a celebration. For special occasions, a swirl of whipped cream or a fresh berry on top adds color and a pop of flavor.
Side Dishes
Serve these cakes alongside a cold glass of milk for the ultimate nostalgic pairing, or go a bit more grown-up with a cappuccino or strong coffee. If you’re hosting a dessert spread, a platter with some fresh berries and a light fruit salad pairs beautifully with the richness of the chocolate and cream.
Creative Ways to Present
Stack your Cream-Filled Chocolate Dream Cakes on a tiered cake stand for a party-worthy centerpiece. For a playful twist, wrap each cake in parchment paper and twine to create homemade “snack cake” gifts for friends. Or, slice them in halves or quarters and arrange on a platter with decorative picks for a sweet appetizer-style treat at gatherings.
Make Ahead and Storage
Storing Leftovers
Leftover Cream-Filled Chocolate Dream Cakes can be kept in an airtight container at room temperature if your kitchen is cool or in the fridge if it’s warm. They’ll stay fresh and delicious for up to three days, though the fresh cream filling is at its best in the first 48 hours.
Freezing
These cakes freeze beautifully! Once the chocolate coating is fully set, wrap each cake tightly in plastic wrap and pop them into a freezer-safe bag or container. They’ll keep for up to three months. For best texture, allow them to thaw in the refrigerator overnight before serving.
Reheating
While Cream-Filled Chocolate Dream Cakes are meant to be enjoyed at room temperature or chilled, if you prefer a slightly gooey center and glossy coating, you can microwave them for just 5 to 10 seconds. Be careful not to overheat, or the cream filling might melt out!
FAQs
Can I make Cream-Filled Chocolate Dream Cakes without a mini cake pan?
Absolutely! A regular muffin or cupcake tin works perfectly. You can even shape the cakes by hand if you’re feeling rustic. Just keep an eye on the baking time, as thinner cakes will cook a bit faster.
Can I use a different filling flavor?
Definitely! Once you’ve mastered the basic vanilla cream, try adding espresso powder, orange zest, or even a little peanut butter to the filling for a fun twist. The base recipe is wonderfully adaptable to your personal cravings.
Is there a dairy-free option?
Yes, you can make these with your favorite plant-based butter substitute, a non-dairy milk, and even coconut cream in the filling. Use dairy-free chocolate chips for the coating, and you’ve got a treat everyone can enjoy.
How do I keep the chocolate coating smooth and shiny?
Adding coconut oil or butter to the melted chocolate gives it that beautiful glossy finish and makes it easier to coat the cakes smoothly. For extra shine, let the chocolate cool slightly before dipping, and set your cakes on parchment so they peel off easily.
Can I assemble Cream-Filled Chocolate Dream Cakes ahead for a party?
Yes! In fact, assembling them a day ahead allows the flavors to meld, and the chocolate coating will be perfectly set for serving. Just keep them chilled until you’re ready to wow your guests.
Final Thoughts
Once you try these Cream-Filled Chocolate Dream Cakes, you’ll find every excuse to make them again and again. They’re joyfully nostalgic, impressively delicious, and such fun to share. Go ahead, treat yourself and your loved ones—you’ll never look at snack cakes the same way!
Print
Cream-Filled Chocolate Dream Cakes Recipe
- Total Time: 35 minutes
- Yield: 10 cakes 1x
- Diet: Vegetarian
Description
Cream-Filled Chocolate Dream Cakes are decadent mini chocolate cakes with a light, fluffy vanilla cream center and a luscious chocolate coating. Inspired by nostalgic snack cakes, these homemade treats offer a tender crumb and rich chocolate flavor—all from scratch, and even better than store-bought!
Ingredients
For the Cakes:
- 1 cup all-purpose flour
- 1/3 cup unsweetened cocoa powder
- 1/2 teaspoon baking soda
- 1/4 teaspoon salt
- 1/2 cup granulated sugar
- 1/2 cup brown sugar
- 1/2 cup unsalted butter, softened
- 2 large eggs
- 1 teaspoon vanilla extract
- 1/2 cup whole milk
For the Cream Filling:
- 1/2 cup unsalted butter, softened
- 1 cup powdered sugar
- 1 teaspoon vanilla extract
- 2 tablespoons heavy cream
For the Chocolate Coating:
- 1 cup semi-sweet chocolate chips
- 2 tablespoons coconut oil or butter
Instructions
- Prep the Oven & Pan: Preheat your oven to 350°F (175°C). Grease or line a mini cake pan or cupcake tin to prevent sticking.
- Mix Dry Ingredients: In a medium bowl, whisk together the flour, cocoa powder, baking soda, and salt. Set aside.
- Cream Butter & Sugars: In a large bowl, beat the granulated sugar, brown sugar, and softened butter until the mixture is light and fluffy, about 2-3 minutes.
- Add Eggs & Vanilla: Beat in the eggs one at a time, mixing well after each addition. Stir in the vanilla extract until combined.
- Combine Wet & Dry Ingredients: Alternately add the dry flour mixture and milk to the butter mixture, beginning and ending with the dry ingredients. Mix just until combined; don’t overmix.
- Bake the Cakes: Spoon batter into the prepared pan, filling each cup about 2/3 full. Bake for 12-15 minutes, or until a toothpick inserted into the center comes out clean. Cool cakes completely on a wire rack.
- Prepare the Cream Filling: While cakes are cooling, make the filling. Beat the butter until creamy, then gradually add powdered sugar. Mix in vanilla extract and heavy cream; beat until the filling is light and fluffy.
- Fill the Cakes: Once the cakes are cool, carefully slice each in half horizontally. Pipe or spread cream filling onto the bottom half and top with the other half to sandwich.
- Make the Chocolate Coating: In a microwave-safe bowl, melt the chocolate chips and coconut oil (or butter) in 20-second bursts, stirring between each, until smooth and glossy.
- Coat the Cakes: Dip each filled cake into the melted chocolate or spoon the chocolate over the top to coat thoroughly. Place cakes on parchment paper.
- Set the Coating: Let the cakes rest until the chocolate coating is firm—this can be sped up by chilling them briefly in the refrigerator.
Notes
- Ensure cakes are completely cool before filling and coating to prevent melting the cream or glaze.
- Use piping bags for a neater cream layer, or simply spread with a knife for a rustic look.
- Substitute coconut oil with butter for a slightly different coating flavor.
- Cakes keep best in the refrigerator in an airtight container for up to 3 days.
- For a gluten-free version, substitute a gluten-free all-purpose flour blend.
- Prep Time: 20 minutes
- Cook Time: 15 minutes
- Category: Desserts
- Method: Baking
- Cuisine: American
Nutrition
- Serving Size: 1 cake
- Calories: 320 kcal
- Sugar: 26g
- Sodium: 115mg
- Fat: 20g
- Saturated Fat: 11g
- Unsaturated Fat: 7g
- Trans Fat: 0g
- Carbohydrates: 36g
- Fiber: 2g
- Protein: 3g
- Cholesterol: 55mg