
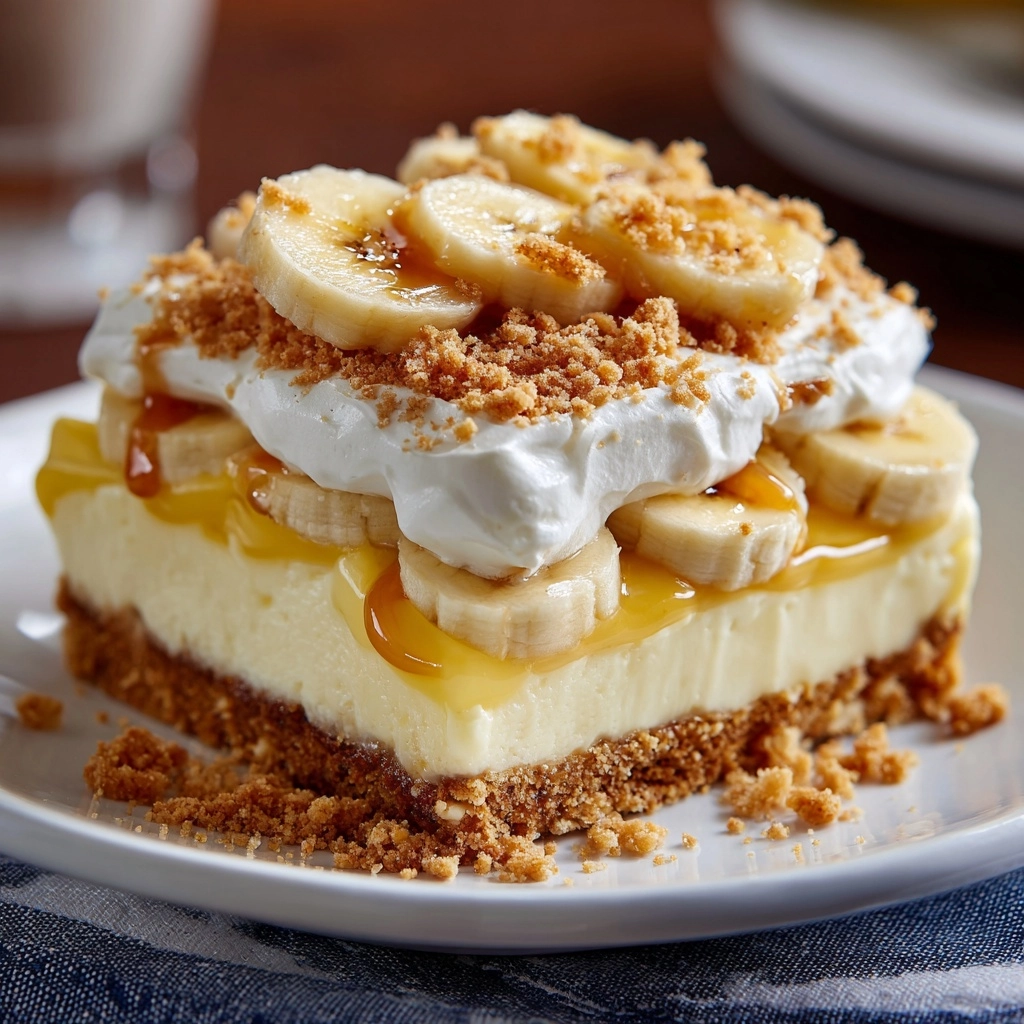
Creamy and dreamy, this banana cheesecake delight layers rich banana flavor with a luscious cheesecake base—perfect for gatherings or indulgent desserts.
Ingredients You’ll Need
One of the best things about this dessert is how it transforms simple, everyday ingredients into pure decadence. Each component plays a key role, from the buttery crust to the creamy topping, so don’t skip a thing. Here’s what you’ll need to make Banana Cheesecake Delight come to life:
- Nilla Wafers: These classic vanilla cookies create the perfect crunchy, flavorful base for the crust and add nostalgia to every bite.
- Brown sugar: A touch of brown sugar deepens the crust’s sweetness and brings out a subtle caramelized flavor.
- Melted butter: This binds the crust ingredients and guarantees a rich, decadent foundation.
- No-bake cheesecake filling: Quick, creamy, and luscious—find this easy shortcut in the dairy aisle near the cream cheese.
- Vanilla instant pudding mix: Two small boxes ensure the pudding layer is thick, flavorful, and perfectly creamy.
- Cold milk: Essential for activating the pudding mix; cold milk ensures the pudding sets up thick and smooth.
- Rum extract (optional): Just a few drops give your dessert a special hint of depth and warmth—use if you want a little extra flair.
- Fresh bananas: Sliced bananas infuse the dessert with naturally sweet, fruity flavor and irresistible aroma.
- Cool Whip or homemade whipped cream: A cloud of creamy topping finishes everything with a light, airy touch.
- Extra Nilla Wafers, sliced bananas, and caramel: These are the perfect (and highly recommended) finishing touches for flavor and visual appeal.
How to Make Banana Cheesecake Delight
Step 1: Make the Nilla Wafer Crust
Start by pulsing your Nilla Wafers in a food processor until they resemble fine, sandy crumbs. This is the moment they transform from snack to superb crust. Mix those crumbs with the brown sugar and melted butter in a large bowl until everything is evenly moistened—you want every bite to have that buttery goodness. Press the mixture firmly and evenly into the bottom of a 13×9-inch dish, making sure it’s packed in nice and tight. Pop the crust in the fridge for 10 minutes while you get the next layers ready.
Step 2: Spread the Cheesecake Filling
Grab your store-bought no-bake cheesecake filling (what a lifesaver, right?) and spread it gently over your chilled crust. Take your time to create an even layer with a spatula, reaching each corner so every slice gets a generous amount. The cheesecake layer brings luscious tang and creamy richness to your Banana Cheesecake Delight, so don’t skimp!
Step 3: Prepare the Pudding Mixture
In a separate bowl, whisk together the vanilla instant pudding mixes, cold milk, and rum extract if you’re using it. Beat vigorously until the mixture thickens and all the clumps are gone. This pudding layer is key—it brings that irresistibly smooth texture and sweet vanilla flavor that ties the whole dessert together.
Step 4: Layer the Bananas
Peel and slice your bananas just before layering to keep them fresh and bright. Arrange the banana slices evenly over the cheesecake layer, making sure they’re distributed all the way to the edges. These sunny slices add bursts of fruity flavor and a pleasant bite, making the Banana Cheesecake Delight feel extra special.
Step 5: Add the Pudding and Top with Whipped Cream
Carefully pour the prepared pudding mixture over the banana layer and use a spatula to gently even it out. Next comes the crowning glory: a cloud of Cool Whip (or homemade whipped cream, if you’re feeling fancy). Spread it generously across the pudding, making swoops and swirls for that irresistible, bakery-style look. Chill the entire dessert in the refrigerator for at least 1 hour, or until fully set and beautifully cold.
Step 6: Garnish and Serve
Just before serving, add your final touches! Top your Banana Cheesecake Delight with extra slices of banana, more Nilla Wafers (whole or crushed), and a generous drizzle of caramel sauce. The presentation is almost as indulgent as the first bite!
How to Serve Banana Cheesecake Delight

Garnishes
Nothing says “made with love” quite like thoughtful garnishes. Add waves of sliced fresh banana, a scattering of extra Nilla Wafers, and a gooey stream of caramel right before you serve. If you really want to impress, try a dusting of cinnamon or a sprinkle of toasted coconut on top—these little extras make the Banana Cheesecake Delight truly unforgettable!
Side Dishes
Pair your creamy Banana Cheesecake Delight with something light and fresh. A bowl of mixed berries is a great choice, brightening up each bite with natural tartness. If you’re serving this at a celebration, a fresh-brewed pot of coffee, or herbal tea, makes the ultimate companion. Kids absolutely love it with an icy glass of milk!
Creative Ways to Present
Let your imagination run wild! You can layer the ingredients in small mason jars for individual parfaits (adorable and portable), or scoop into cupcake liners for bite-sized treats perfect for parties. For a dramatic presentation, serve squares on pretty cake stands with extra caramel on the side so your guests can pour as much as they like. The secret to unforgettable Banana Cheesecake Delight? Make it yours!
Make Ahead and Storage
Storing Leftovers
If you’re lucky enough to have leftovers, simply cover the dish tightly with plastic wrap or transfer individual pieces to airtight containers. Store in the fridge for up to 3 days. The cookies will soften but the flavors just seem to get better, making each chilled bite of Banana Cheesecake Delight even creamier.
Freezing
While Banana Cheesecake Delight is best enjoyed fresh, you can freeze it if needed. Wrap the entire dish well in both plastic and foil, or store individual servings in freezer-safe containers. Freeze for up to 1 month. When you’re ready to eat, thaw overnight in the refrigerator—not at room temperature—to preserve texture and flavor.
Reheating
There’s no need to reheat this dessert, as it’s meant to be enjoyed cold and creamy! Simply let chilled or thawed portions sit at room temperature for 10–15 minutes before serving, if you like, to soften the layers slightly—this brings out the best flavors and melt-in-your-mouth texture of the Banana Cheesecake Delight.
FAQs
Can I use homemade pudding instead of instant pudding mix?
Absolutely! If you love making pudding from scratch, just prepare about three cups and let it cool completely before layering it into your Banana Cheesecake Delight. The homemade touch adds extra creaminess and flavor.
What if I can’t find store-bought no-bake cheesecake filling?
No worries! You can whip up a quick substitute by blending softened cream cheese with a bit of powdered sugar and vanilla extract until sweet and smooth. Fold in some whipped cream for that luscious, airy texture.
Will the bananas turn brown?
Bananas do tend to brown over time, but layering them between the creamy cheesecake and pudding helps protect them from air. For extra insurance, you can lightly brush your banana slices with lemon juice before layering.
Is it possible to make Banana Cheesecake Delight gluten-free?
Definitely! Swap the Nilla Wafers with your favorite gluten-free vanilla cookies or graham crackers. Check your pudding mixes for gluten as well, and you’re all set to enjoy a gluten-free version.
Can I prepare Banana Cheesecake Delight a day ahead?
Banana Cheesecake Delight is the perfect make-ahead dessert! In fact, preparing it a day in advance allows the flavors to meld and the layers to set extra firmly. Just wait until right before serving to add your banana slices and garnishes for the freshest look.
Final Thoughts
If you’re looking for the ultimate shareable dessert—one that combines creamy, crunchy, and fruity in every spoonful—Banana Cheesecake Delight is for you. This recipe is as fun to make as it is to eat, and you’ll find yourself dreaming up excuses to make it again and again. Gather your ingredients and treat your tastebuds to something truly special!
Print
Banana Cheesecake Delight Recipe
- Total Time: 1 hour 20 minutes
- Yield: 12 servings 1x
- Diet: Vegetarian
Description
Creamy and dreamy, this banana cheesecake delight layers rich banana flavor with a luscious cheesecake base—perfect for gatherings or indulgent desserts.
Ingredients
For the Crust
- 1 box Nilla Wafers
- 1/4 cup brown sugar
- 1 1/2 sticks (12 tablespoons) melted butter
For the Cheesecake Layer
- 1 container no-bake cheesecake filling (store-bought, near the cream cheese section)
For the Pudding Layer
- Two (3.4 oz) boxes vanilla instant pudding mix
- 3 cups cold milk
- Optional: a few drops of rum extract
For Assembly
- 3–4 fresh bananas, sliced
- 1 container Cool Whip or homemade whipped cream
For Garnish
- Extra Nilla Wafers
- Sliced bananas
- Caramel sauce
Instructions
- Make the Crust: Pulse the Nilla Wafers in a food processor until finely crushed. Mix with brown sugar and melted butter until all the crumbs are evenly moistened. Press this mixture into the bottom of a 13×9-inch dish, forming an even layer. Refrigerate for 10 minutes to firm up.
- Add the Cheesecake Layer: Evenly spread the no-bake cheesecake filling over the chilled crust, smoothing the top with a spatula.
- Prepare the Pudding: In a large bowl, whisk together the instant pudding mixes, cold milk, and rum extract (if using) for about 2 minutes, until the pudding thickens.
- Layer the Bananas: Slice the bananas and arrange them in a single, even layer on top of the cheesecake layer.
- Add the Pudding Layer: Carefully pour and spread the vanilla pudding mixture over the bananas, making sure to cover them completely and smooth the top.
- Top with Whipped Cream: Gently spread a generous layer of Cool Whip or homemade whipped cream over the pudding layer.
- Chill: Place the dessert in the refrigerator and chill for at least 1 hour (or until fully set) so the layers can firm up.
- Garnish and Serve: Just before serving, decorate the top with extra sliced bananas, Nilla Wafers, and a drizzle of caramel sauce for an irresistible finish.
Notes
- To prevent banana slices from browning, toss them lightly with a little lemon juice before layering.
- This dessert is best served cold and can be made up to a day in advance.
- Customize by substituting chocolate pudding or strawberry slices for a twist on flavors.
- Store leftovers covered in the refrigerator for up to 2 days.
- Prep Time: 20 minutes
- Cook Time: 0 minutes
- Category: Desserts
- Method: No-Cook
- Cuisine: American
Nutrition
- Serving Size: 1/12th of the pan
- Calories: 375 kcal
- Sugar: 29 g
- Sodium: 300 mg
- Fat: 18 g
- Saturated Fat: 9 g
- Unsaturated Fat: 8 g
- Trans Fat: 0 g
- Carbohydrates: 48 g
- Fiber: 1 g
- Protein: 4 g
- Cholesterol: 35 mg